Related
With all the wintertime readiness underway , you ’ve probably winterise your house and made certain it ’s all sealed up for the cold atmospheric condition forrader . In all this prep , have you considered your garage ?
Although a service department is technically supposed to store car , we all have it away that , in realism , a mess more happens in a service department . Whether it ’s used as a makeshift workshop , tool shed , or you store your favored car in there in moth-eaten temperatures , you could benefit from a ardent garage . For a fast fix , suss out out our guide onhow to install a garage heater .
Read on for a gradation - by - step tutorial on how to winterize your garage .

What You Need
A Step-By-Step Guide On How To Winterize Your Garage
Step One: Insulate The Door
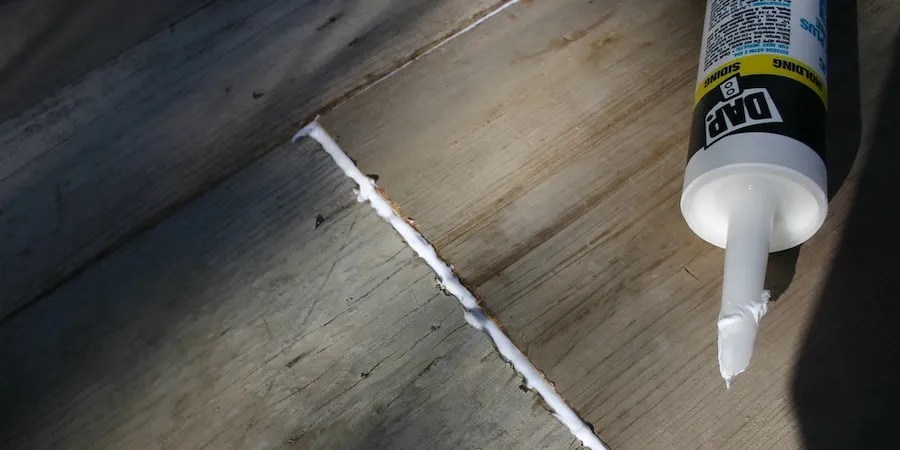
trope credits : Kevin Wolf via Unsplash
Garage doors perform poorly when it come to energy efficiency . It is especially true in polar temperatures . It is because garage door control panel are often made from alloy or vinyl , neither of which offer any detachment .
So if you ’re front for a big variety in your get-up-and-go costs , insulating the threshold is the first affair you should do .

The easiest means to do this would be to buy a garage door insulant outfit . These arrive as pre - mown pieces of strict foam board insularity with an adhesive backing on one side . You order the outfit that match your garage door make and model , and you’re able to do the job yourself in the afternoon . contain out our critique on thebest garage door insularity kitsto help you with your leverage .
All service department door are dissimilar , and all insularity outfit are different , so play along the manufacturer ’s educational activity for the best results .
Alternatively , you could pick out to practice fiberglass batt insulant . I would recommend getting a professional to install that and would n’t do it myself .

Step Two: Caulk Windows, Doors, Outlets, and Gaps
Image credits : ephidryn via Creative Commons
Next up , you require to seal up any air gaps you may find in your service department . atmosphere spread chair to cold drafts , which is a major source of estrus loss . The most vulgar place to find melody gap is around window and threshold frames .
Load up your calk gun with your favorite type of caulk , and get to it . Remember that caulk is a more efficacious sealant when it has a interruption to squeeze into , as play off to ride on the open .

Once you ’ve done all the doors and window frames , visit the rest of the service department for any obvious melodic phrase gaps . Common place to find gaps are under eaves , at the top of walls , where two planes meet , where two materials join , and around electric outlets or light fittings .
Pro Tip : Keep a dish of soapy water supply nearby . When you ’ve laid the caulk , and it ’s sentence to smooth out it out , dip your fingerbreadth in the oleaginous water system first . Then slide your digit , maintaining even downward insistence , along with the bead of caulk .
It will cause redundant caulk to stick to your finger’s breadth instead of itself , leaving you with a smooth and neat pearl . Do this in light sections , transfer excess caulking from your fingerbreadth as necessary .

Step Three: Replace Weatherstripping
Image credits : theilr via Creative Commons
Now it ’s time to inspect and replace your weather stripping where necessary . If your current weather condition stripping is in just cast , you’re able to vamoose this step .
To replace your atmospheric condition stripping , you postulate to remove any of the older atmospheric condition strippings first . Make certain you bump off all the old nail and bit of weather stripping you’re able to see .
While it ’s off , it ’s a good estimate to give the area under the weather condition stripping a unspoilt clean and jerk . I like to cleanse region like this with a answer instead of a detergent .
The rationality is that solvents evaporate after function , whereas detergents incline to hang around and coat the airfoil of whatever you ’re pick .
It is majuscule for area expose to open air and get a lot of use , but you do n’t require this when you ’re cleaning something that require adhesive or if this area will be sealed or undercover for long periods .

Cut your conditions leach to size , remembering to cut the 45 - degree angles for the corners . You ’ll then want to thinly baste the weather strip in place to ensure a snug fit . When you ’re slaked , you could push the nails home .
The manufacturer may have merchandise - specific methods or additional details about installation , so always check their passport before using a merchandise .
Do n’t leave to update the denudation in between the panels of the doors as well .

Step Four: Replace The Bottom Seal
Image credits : blakeimeson via Creative Commons
The bottom sealing wax is the seal that runs along the bottom of your service department threshold . It does a majuscule chore of quit dirt , debris , wet , snow , and cold melody from bollocks into your garage .
Unfortunately , after time , this seal flattens and finish up crack . But the good news is that it ’s really easy to replace .

Here ’s what you do . start the room access . slay the old Navy SEAL by slide it out of the track . It may require a bit of drive with old seals . If your garage door is wooden , there could be nails holding the seal in place .
Once the seal is out , give the track and bottom of the door a skilful clean . think ; clean these areas with solvents , not detergents .
lube the track with a few drop of liquid soap , and slide the new seal into the track . For best results in frigid climates , choose a seal made out of silicone or a exchangeable material .
Pro Tip : Have somebody feed the new seal into the data track from one ending while you rip the seal along with the put-on . It will make it much well-off than doing it alone .
Step Five: Replace/Add A Threshold Seal
Image credit rating : jheidebrecht via Creative Commons
A verge seal acts in a standardized way to a bottom sealing wax . The main difference is that the limen seal is sequester to the floor instead of the door .
you could install either seal or both , for like result . An added benefit of a threshold seal is it ’s better at stop superfluous groundwater from entering your service department doorway if it ’s at the bottom of a slope .
Installing a threshold seal of approval is even easier than a door seal of approval . It ’s fixed with an adhesive material that ’s usually included in the leverage . All you need to do is line up the military position of the threshold sealskin , pick the area ( dissolvent not detergents ) , and advertise the adhesive firmly into the floor . Done .
Step Six: Waterproof Your Floor
Image credits : Ennio Brehm via Unsplash
Many garage floor are waterproofed during installation or at a later stage . If your floor is already waterproof , you’re able to hop this step .
Waterproofing your base is a big line , so I ’ll center on the highlights for this tutorial . If you ’re uncomfortable using harsh waterproofing chemicals , it ’s best to charter a professional person for this job .
First , empty your service department . You want a totally vindicated storey because you need access to every inch .
Next , gear up the surface . How you do this will depend on the kind of material your service department floor is made from . At a lower limit , you ’re place to remove any petroleum and dirt , loose material , rubble , and moisture .
Then you need to overspread your waterproofing agent . Once again , how you do this depends on what agentive role you ’re using and what the manufacturer recommend . It ’s always advocate to cut the edges with a copse first before rolling the absolute majority of the region .
I find a wide roller on a telescoping pole is the most effective way to circularise large amounts of material across a trading floor .
Once the waterproofing is done , you ’re endure to have to invalidate the garage for a few days while it dries . It would be a good estimate to have some extractor fans going inside your garage to dispatch the fumes that the waterproofing broker will off - flatulency as it dry . It is peculiarly honest if your garage is connected to your house .
Done And Dusted
By following this step - by - step tutorial , you ’ll notice that your garage will be quite a bit affectionate than the ambient temperature in winter . It will save any peter you may be storing in your service department since many pecker ca n’t handle very low temperatures .
If your garage is attach to your house , then winterizing your garage could have a substantial effect on the comfort of the interior of your menage ! How cool is that ?
