BULBS > GALANTHUS > SOWING
IN THIS GUIDE
GALANTHUS GUIDES

SowingVarieties
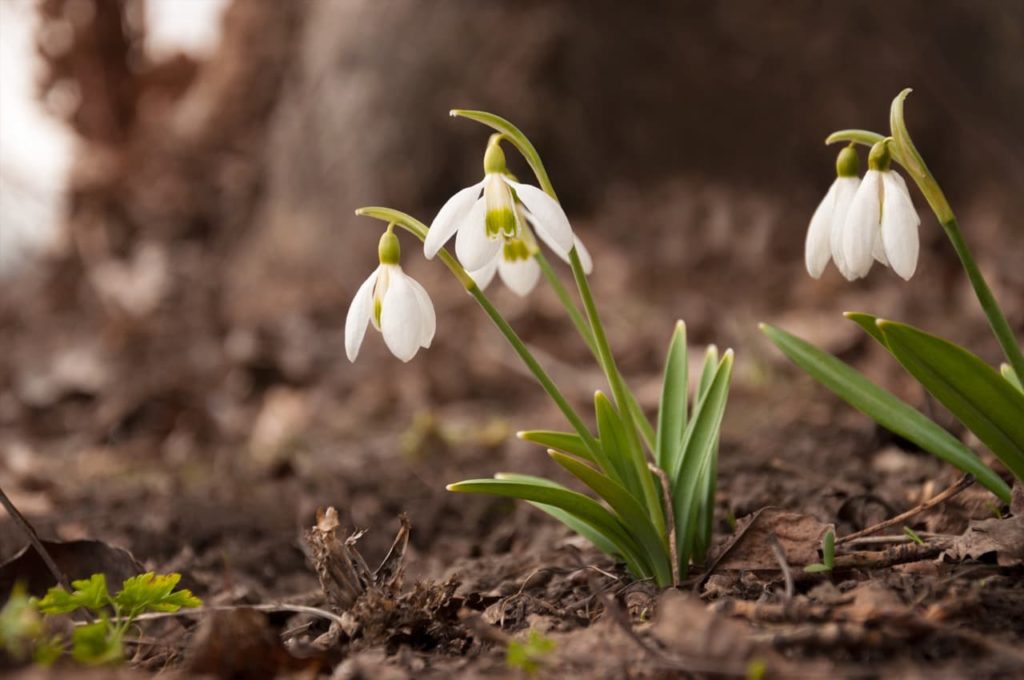
You do n’t have to wait for the common spring lightbulb to awaken to be able-bodied to receive in spring , as many snowdrop potpourri blossom from February !
These petite smoothy average around 15 cm in height with similar spreads , bearing bell - mold flowers that are double-dyed white and are often check off or edged in tones of green .

Although these stunning bloom are usually originate from bulbs , you could also grow snowdrops from seeded player , but be admonish – it ’s quite guileful !
Luckily , I ’m able to talk you through it ; you could grow snowdrop from seed by following these steps :
This process is excuse in more depth below .

1) Prepare Pots
groom 9 cm potty with seed compost or seed starting mix .
John Innes seed - sow in compost from a reputable Creator is a very good choice .
Give it a good water , make certain that the grow medium is moist .
2) Sow Galanthus Seeds
“ I get a lot of Snowdrops from seed each class , so I am always hoping that I will discover an exciting new seedling in flower for the first time , ” enunciate Jane Rawlinson , Owner of Morlas Plants .
you may either collect seeds from the pods of existing plants in spring or acquire them from your local ( or online ) plant glasshouse .
“ Sowing the sweet seed will result in the best event , ” explains Jane .

“ Look for a seeded player pod that is turn yellow and almost splitting open , then either place the seedpod directly into the ground with a recording label or put it into a pot .
“ you’re able to also take the seeds out of the pod and thinly sow them into the dry land or sens . ”
Sow seeds thinly by lightly nudging them into the medium and cover with a 1 curium sprinkling of coarse sand or grit .
Four seeds per one 9 centimeter pot is a good sowing charge per unit .
“ They do n’t need to be immerse deeply and are best covered with a fine layer of grit , ” adds Jane .
deaden the medium . Though you may use a nebulizer , a watering can with a pink wine will do work very well .
“ To avoid dislodging seeds , hatful can be place in a tray of water for half an hour to soak up the moisture they ask , ” shares Peter Lickorish , a Horticultural Consultant .
3) Wait For Germination
commit the pots outdoors in a cold physical body located in a sheltered spot where it should receive some sunlight .
As wintertime departs , snowdrop seedling should emerge .
The seedlings will look more like sword of Gunter Grass than anything else .
Now is when the veridical work starts , as you will have to keep the inchoate plant going until it becomes a viable electric light , which can take up to 4 years .
“ Sowing snowdrops requires forbearance and label ! ” jokes Peter .
“ As the seedlings will be inactive for the majority of the year , check that you label your sowings with a plant name and appointment of sowing . Otherwise , you could mistake them for an empty pot .
“ Your label will need to last . I ’ve test all sorts of labelling method and generally recommend pencil , because it has proven the least likely to wither .
“ shaping labels are a good alternative because , unlike wooden lollipop stick or similar , they do n’t waste . Pencil markings can simply be rubbed off and the recording label re - used many times over . ”
4) Keep Seedlings Moist
Keep middling water the seedlings so that the dirt stays continuously moist .
This also includes lachrymation during summertime and autumn quiescency when the foliage has died back and all you have are empty pots .
“ If growing in smoke , make certain the compost is innocent draining and that it does n’t get too wet as the seed will rot , but also do not allow the seeds to dry out at any point , ” enunciate Jane .
From the 2nd yr , begin to feed the little plant once a month with a dilute liquid all - purpose fertiliser .
5) Pot-On In Individual Containers
In the plants ’ third year , pot them on into single containers .
You should use a suitable 9 cm or 13 cm pot that has been occupy with moist , peat - free , manure - establish compost .
I ’d recommend that you pot on in March or April when you see the foliage yellowing and atrophy .
The leaves will allow you to hunt down the bulbs , no matter how flyspeck they may be and wherever they may be located .
Using the foliation as a guide , you’re able to re - plant the bulbs to the same soil depth that they were at before .
Once repot , cover the bulbs , dab down the soil and water them in .
keep as before , making certain that the dirt continue moist so that the tiny bulb do not dry out .
After 1 - 2 year the bulb will have matured and will be good to go in opened land .
